Dalek mod U47 MDL Model system[Tutorial by EdusgprNetwork]
Hello! On this new patch, we worked hard on the new MDL system which is why we took the entire week to release this patch. Full change log for the patch can be found in the Dalek Mod 1.8 thread.
What took us so long to update were the older exteriors that weren't in MDL format. But as of now all exteriors have been converted to the MDL format.
What is the MDL format?
It's a new model format that John(1WTC-mod creator/developer) created for rendering models in Update 44-Current versions of the mod. This model format allows changing block/tile entities models with the use of resource packs!
What can I change?
Anything in the mdl format. They can be found in the assets/models/mdl folder.
How to change models
This tutorial is divided in 2 parts: Basics and Advanced.
Basics
First of all, you need to choose one of the two following modeling softwares:
Techne or Tabula.
Modelling tutorials can be found here:
Techne:
https://www.youtube.com/watch?v=foHMzIkUsKE&list=PLUbFMGqeDgftuCw6C14Q_qtZS6cQm9GDl
Tabula:
https://www.youtube.com/watch?v=xS4JEHxD8Uc
Here’s the model we’ll be using for the tutorial
Once you have made your model, you only need to convert your model to MDL using the converter(download link is found on the end of the thread).
Disclaimer: We recommend you to put the Converter jar file in a place of easy access near your models.
-how to use the converter-
After opening the Java application, you'll see this screen.
the file button is where you'll select the models for conversion, if you're using tabula the models are saved in .minecraft/mods/tabula/saves.
Here’s what each button does:
Open Files -Select the tabula(.tbl) or techne(.tcn) model for conversion. Process files -Converts the model in MDL. Clear Files -Clears the queue.. Open MDL File (opens an already converted MDL model). -Editing the model_data file(Advanced part). -replacing/viewing MDL model texture.Show content
First of all you’ll need to select your model, do that by clicking on File>Open Files.
Tabula
After that you’ll need to find your minecraft directory which is usually at %appdata% if you’re on windows.
It’s recommended that you have a shortcut for it somewhere of easy access.
Once you found your minecraft directory, you’ll have to go to mods/tabula/saves.
Select your model and click open.
Techne
for techne you’ll have to open your Techne folder and select your model, varies per user.
Converting
Now that you’ve selected your model for conversion, the Converter should look like this.
Ignore the “Generate Code” option, you won’t need that.
Note
With the model ready for processing, you’ll realise that the “Edit” button has a function when the model is selected like in the image above. Currently the Edit button can only do one thing, it will be explained in the “Advanced” part of the tutorial. Add / Edit JSON -Add/Edit the model_data.json file in the MDL(Advanced part). Clicking the option will open a little window that may look like this. this will be explained later on.Show content
Now to convert your model simply click in File>Process Files.
This will convert the model into MDL.
you’ll be able to find the converted model in the same folder as the Java Application, in a folder called “output”. this is why we recommended to put the converter near somewhere of easy access for your models.
Disclaimer: If the Converter does not create a output folder automatically and fails to Complete model conversion, create a folder called “output” on the same folder as the converter.
Done! you’ve converted your Techne/Tabula Model into MDL! You can now use a resource pack and replace an already existing model with your own!
Yes! this means you can make your own custom TARDIS exterior and use it in a resource pack for all to see!
Disclaimer: Creating actual exteriors involves more steps and is not as simple as stated above
Loading the model
There’s 2 ways of loading your MDL model:
-Through resource packs by replacing one of the already existing ones.
-Through the TCN Loader(to be renamed to “Model Loader”).
TCN Loader/Model Loader
The Dalek Mod itself is equipped with a Model loader of it’s own, to use it is very simple. Go to your minecraft directory, go in mods/Dalek Mod/Models and stick your MDL model there!
Disclaimer: if you’re a Techne user, it’s much more simpler to just stick your .tcn model in there, in the future we plan on adding support to the .tbl models too.
Resource Packs
If you’re gonna use a resource pack, you can replace any previous block with your new model. Just create a resource pack and get the dalek mod assets by extracting the mod jar file and getting the “assets” folder from it. Once you’ve done that you’ll need to go to assets/models/mdl and replace one of the models in there with your own and open the resource pack in game.
Once you’ve done either of the methods of loading your MDL model above, you should have yourself a in game model!
Just remember that if you want other people to see your model in game they’ll need the resource pack or the model too.
Replacing Textures for already converted models
Need to replace a texture for one of your models but don’t want to convert it again?
All you need to do is click File>Open MDL File.
After that you need to select the MDL file for your model and this will pop up.
In this screen you can Update the model_data.json inside the MDL file, Replace and View the Texture of your model.
To replace you need to click File>Replace Texture and select the PNG file for your new Texture.
Once you’ve done that the texture will be replaced
Download the MDL Converter here:
Advanced
As mentioned in the basics part of this tutorial, MDL models have a more advanced settings that you can use to customise even more your model and some that will be needed to make actual TARDIS exteriors with resource packs. These settings are called MDL model data and are saved in the model_data.json file inside the MDL file of your model.
When converting your model, you’ll notice the “Edit” button on the converter.
this button allows you do add/edit the model data for your model.
Although when clicking it to edit your model’s data it will be empty, like this.
If you didn’t know, JSON files require a specific format. For this specific file you’ll need this format
"offset": [ 0.0, 0.0, 0.0 ], "transform": [ 0.0, 0.0, 0.0 ], "scale": [ 1.0, 1.0, 1.0 ], "rotation": [ 0.0, 0.0, 0.0 ], "animation_rotation_offset": [ 0.0, 0.0, 0.0 ], "animation_position_offset": [ 0.0, 0.0, 0.0 ], "font_renderer": [ { "offset": [ 0.0, 0.0, 0.0 ], "transform": [ 0.0, 0.0, 0.0], "scale": [ 1.0, 1.0, 1.0 ], "rotation": [ 0.0, 0.0, 0.0 ], "text": "TEXT", "center_text":false, "color_rgba": [ 1.0, 1.0, 1.0, 1.0 ] }, ] }Show content{
Once copied and pasted the format, you’ll end up with this.

Here’s what each one of these JSON tags do:
“transform”: [ X, Y, Z ]
-This offsets your model, inside the square brackets go the coordinates for it to offset to.
“scale”: [ X, Y, Z ]
-This scales your model up/down by multiplying.
“rotation”: [ X, Y, Z ]
-This rotates your model depending on the “offset” and “transform” tags.
“offset”: [ X, Y, Z ]
-This is the rotation offset, this one is relative from the “transform” tag.
Example: You want to rotate your model but you’ve set the model “transform” tag to [3.0, 1.3, 0.0]. If you want the model to rotate from the block centre then you’ll need to set the “offset” tag to the opposite of the “transform” tag: [-3.0, -1.3, 0.0]
“animation_rotation_offset”: [ X, Y, Z ]
-This offsets the rotation point for animations. This is used in the TARDIS doors, will indicate where to rotate the door from.
Example: You made an TARDIS exterior model, but your door has a broken animation when opening. Try adjusting the “animation_rotation_offset” to a better location near where the door and box are supposed to connect.
“animation_position_offset”: [ X, Y, Z ]
-This one is a transform option for animations. So if for example you wanted to replace a Dalek Eye stalk you can offset the models position (this also offsets the transform, rotation offsets etc) This is really a global offset.
“font_renderer”
-This adds Texts to your model. We use this on the many TARDIS Exteriors to add the Glorious “POLICE PUBLIC CALL BOX” signs.
-This one uses it’s own format which is shown in the image above. It’s tags are the same as mentioned above and they do the same thing as said above but to the texts.
Note: the “font_renderer” tag is not affected by the previous tags. This means that scaling up your model or moving it will not move/scale the Texts.
“text”: “STRING”
-This is what the font renderer will recognise the text as. Setting it to “TEST” will make a big “TEST” text show up in your model.
“color_rgba”: [ r, g, b, a](float values, it means they can be any decimal number from 0 to 1, like 0.5)
-This sets the color of the text that will be rendered. This uses float values, you can use this website to generate a color code: http://doc.instantreality.org/tools/color_calculator/
Note: the font renderer uses a RGBa color code, this means it accepts transparency.
Example: If you want the color Red, which the code in RGBa is [ 1.0, 0.0, 0.0, 1.0]
Note 2: remember that full black is [ 0.0, 0.0, 0.0, 1.0 ] and full white is [ 1.0, 1.0, 1.0, 1.0 ]
Note 3: You can add more than 1 Text, like this:
[spoiler]
{ "font_renderer": [ { "offset": [ 0.0, 0.0, 0.0 ], "transform": [ -0.515, -1.318, -0.831875 ], "scale": [ 0.27, 0.26, 0.29 ], "rotation": [ 0.0, 0.0, 0.0 ], "text": "POLICE BOX", "color_rgba": [ 1.0, 1.0, 1.0, 1.0 ] }, { "offset": [ 0.0, 0.0, 0.0 ], "transform": [ -0.065, -1.312, -0.831875 ], "scale": [ 0.13, 0.12, 0.13<
How to make an TARDIS Exterior
One of the many things you can do with this new MDL system is that you can make a custom TARDIS Exterior yourself and load it in game! All you need is a resource pack and a model to use in the resource pack.
First off, you need to make the exterior model, you can do it either in Techne or Tabula.
Here’s an example:
Once you’ve finished your Exterior model, you’ll need to make 2 copies of the exterior and name one of them “box” and the other “door”.
Now in the “box” model you’ll need to delete the door from the exterior.
And in the “door” model you’ll need to delete the box and leave only the door intact.
Once you’ve done that you can load both into the MDL converter to add the JSON files to them.
It’s better to do the door first. You need to load the model in the program of choice and find the coordinates for where the door and box connect.
you can do that by creating a new piece and move it to the correct place to find the location.
Once you have those coordinates you need to divide them by 16.
In this case they ended up like this:
X: 0.625 Y: 0 Z: -0.75
Note: The same technique can be used for the Font Renderer to add the POLICE BOX signs to your exterior. Be sure to add them to the “box” model instead of the door!
After you obtained the coordinates you need to input them with the format on the MDL converter through Edit>Add / Edit JSON
Now you can click in File>Process Files to convert your models to MDL. Once again the models will be at the output folder near your converter jar file.
Now all you need to do is replace any of these with your exterior instead!
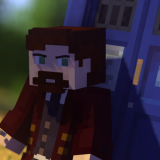
When you’re done it should look like this!
Tutorial End
Download the MDL Converter here:
The Download for the MDL Converter no longer works
Contact Us
Email: support@swdteam.com
Mail: SWDTeam, PO Box 1202, Whitstable, CT1 9RL